wearesober
The cheapest connected temperature sensor for dummies (like me)
The main objective is to create a connected sensor with the lowest knowledge from electronics. No code, no welds (or minimal), no electronical skills etc.
What you’ll need.
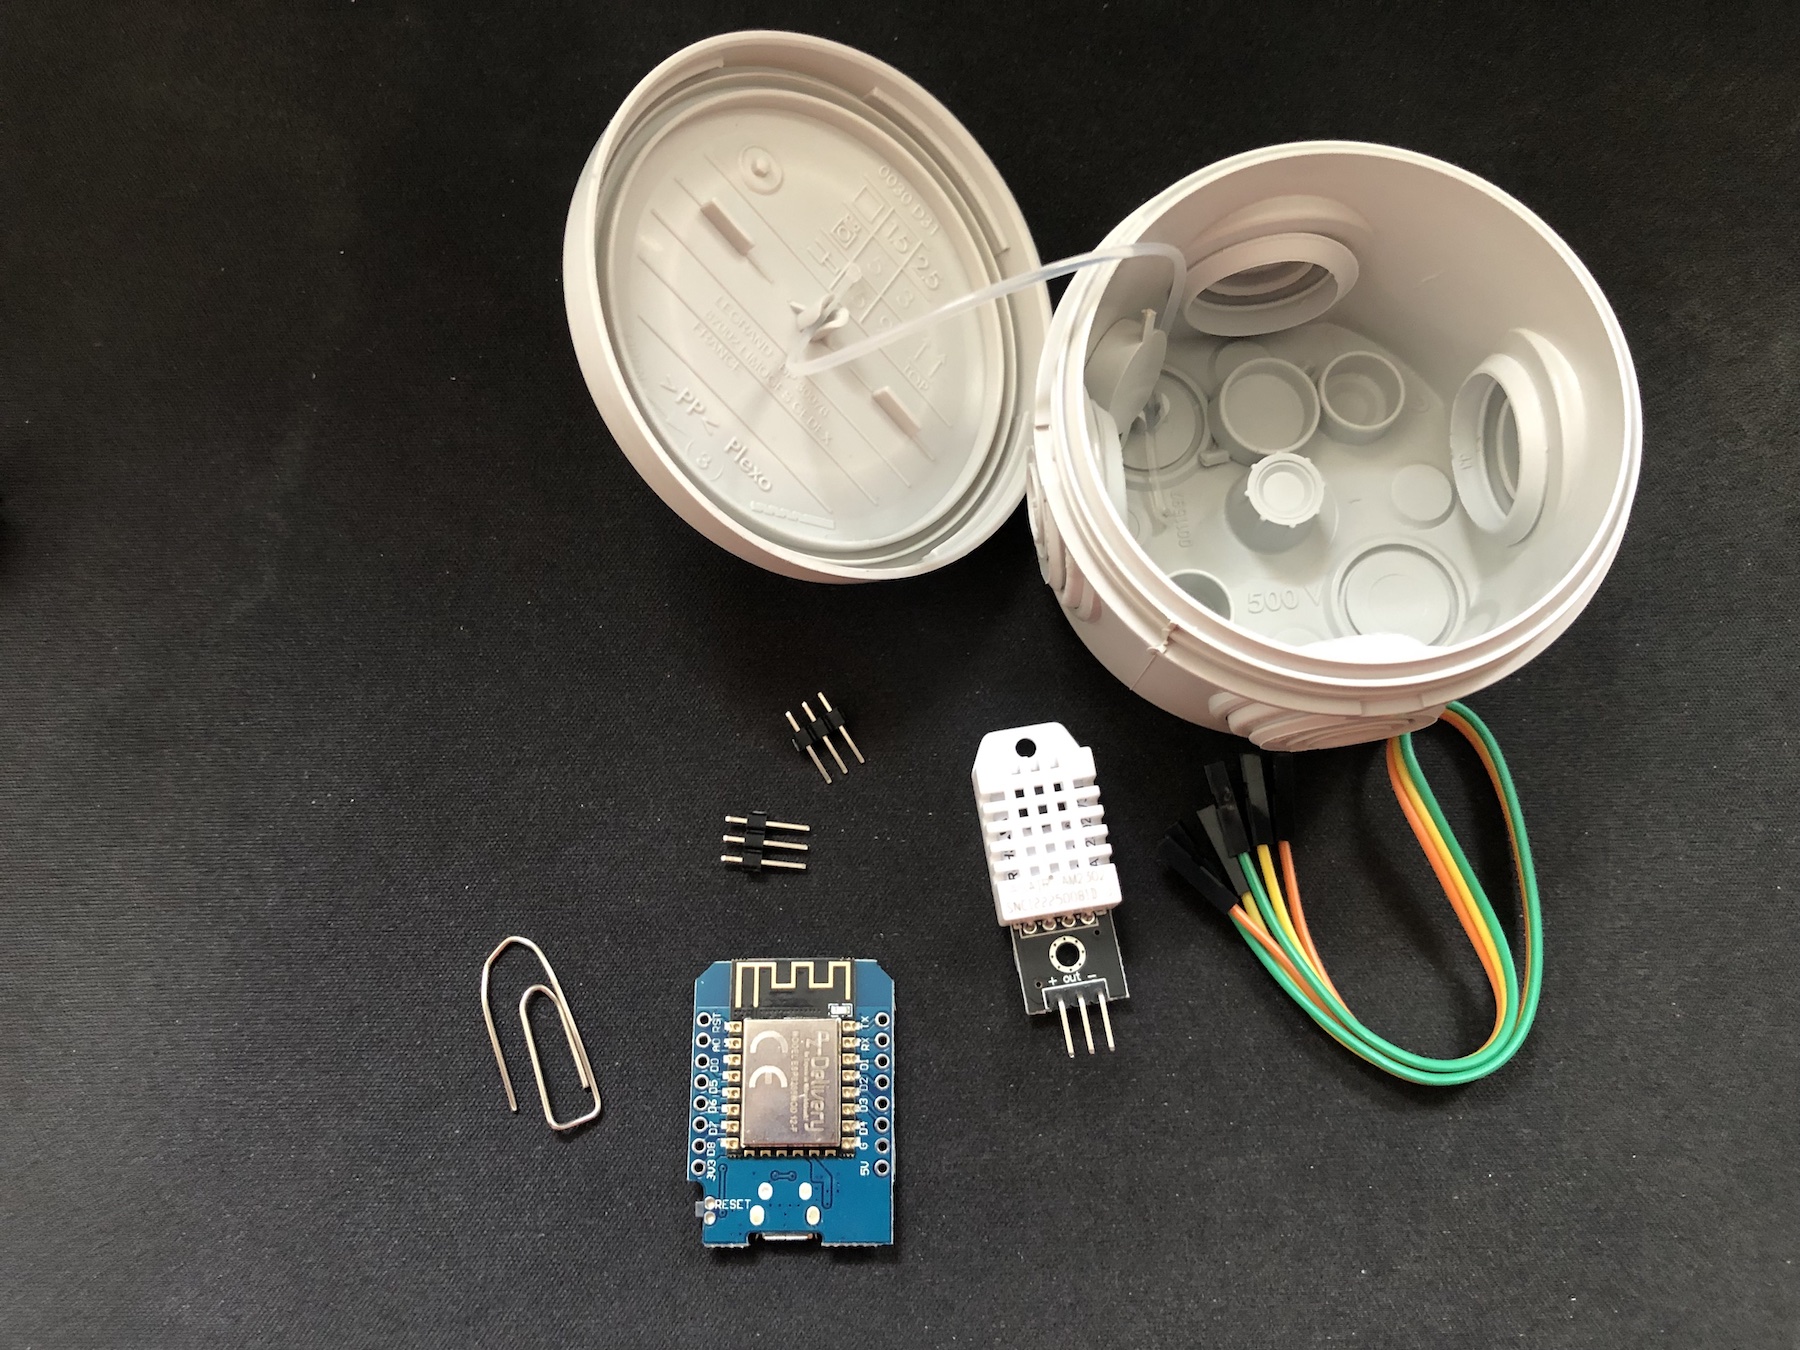
| Item | Price | Description |
|---|---|---|
| D1 Mini NodeMCU ESP8266-12F | ~5€ | price is from Amazon (France) |
| DHT22 AM2302 | ~7€ | price is from Amazon (France) |
| 1 box | ~3€ | i’ve bought a small box for outside electrical enclosure |
| total | ~15€ |
You should also use a raspberry pi or any computer to collect and display data. (we’ll see it later)
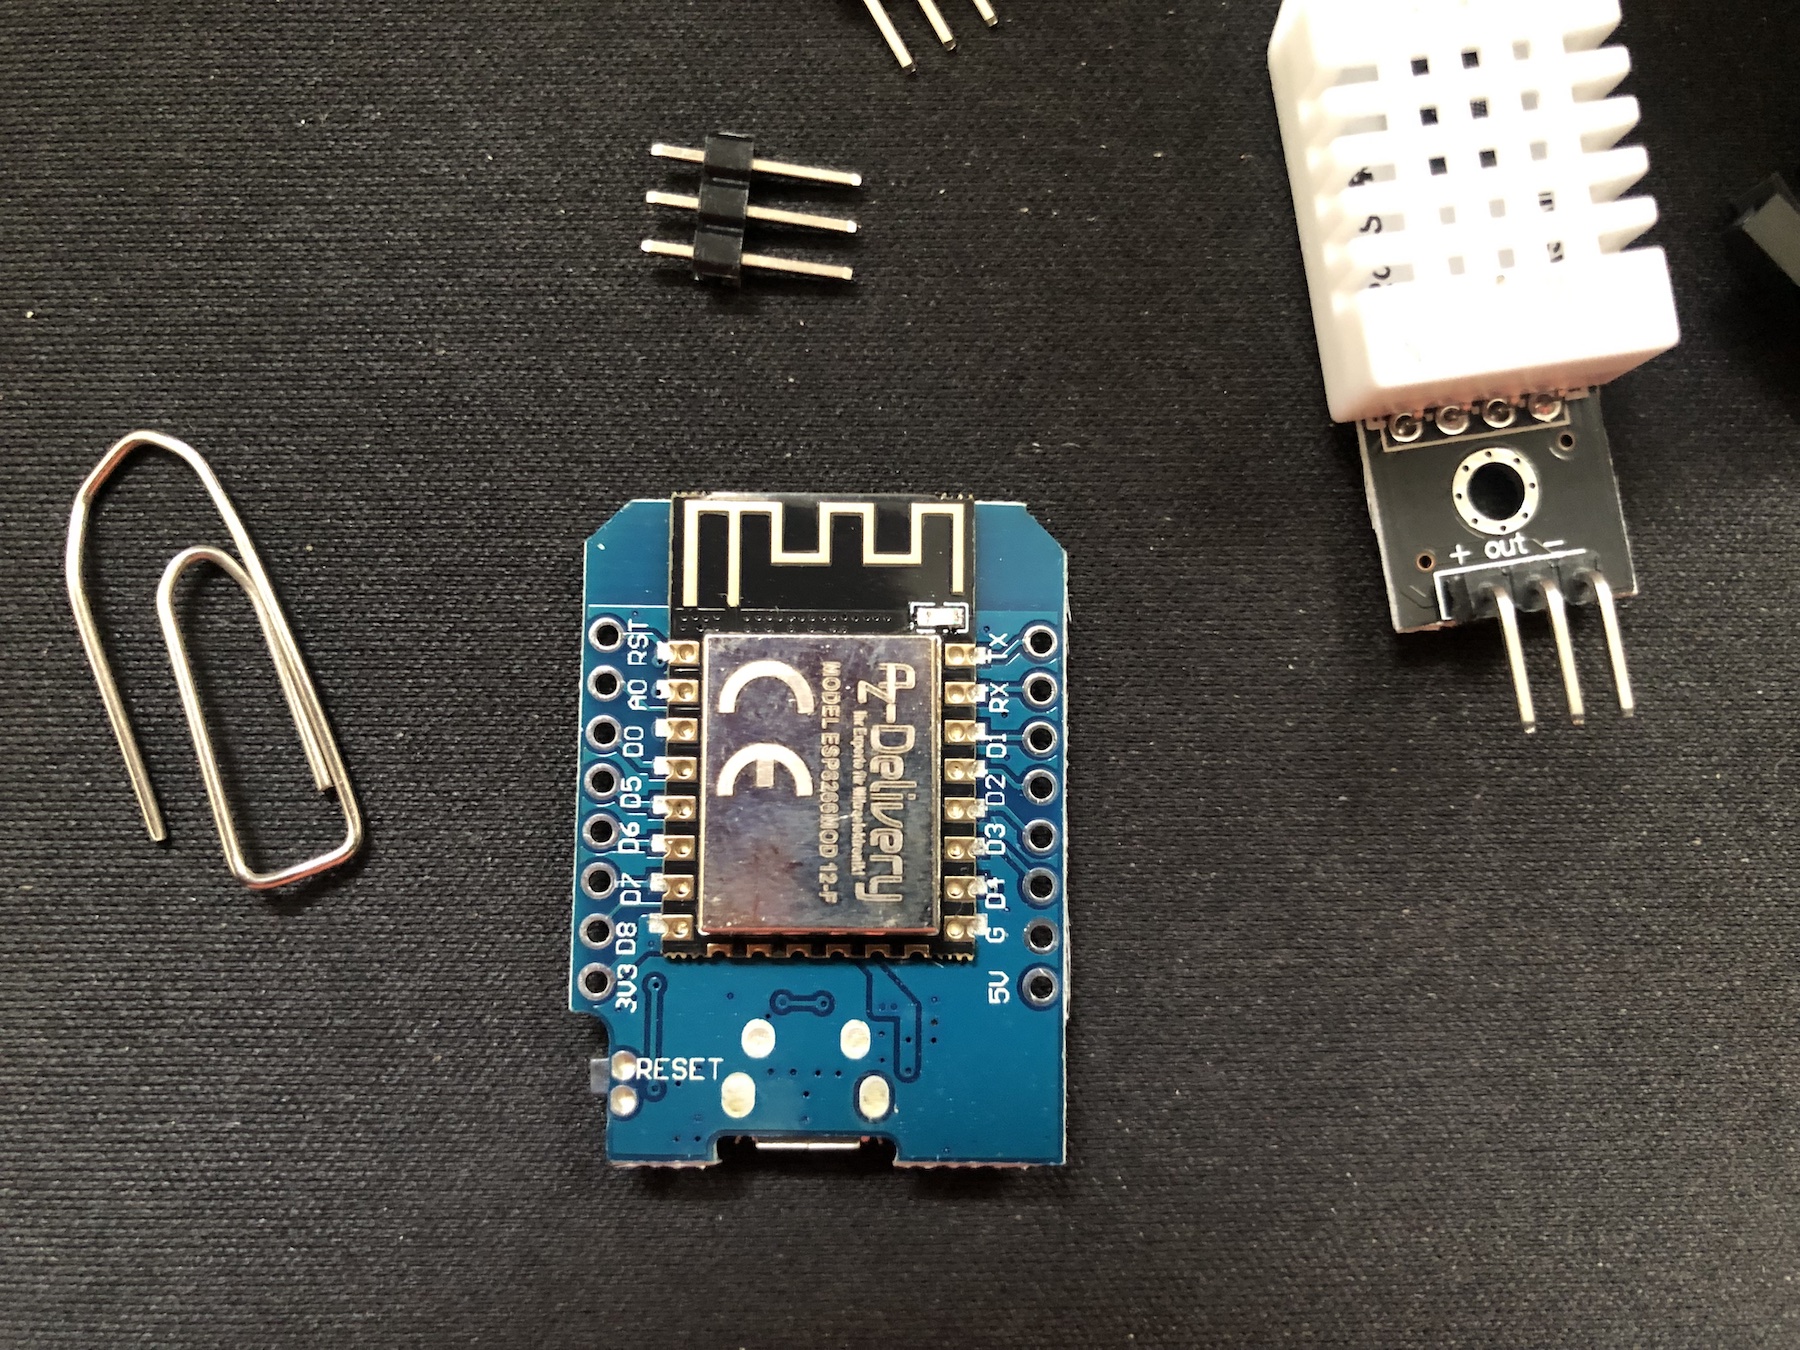
D1 Mini
First, i’ve tried to find the best suitable microcontroller. I’ve already played with ESP8266 in 2015 and since, ESP32 has became the flagship of Espressif. Strangly, i can’t find any competitor as cheap as ESPxxx. To take a measurement and go to sleep, ESP8266 seems the best choice.
D1 mini offers a true board that accepts 5v but also it’s easy to program just by plugging a USB cable.
Flashing the D1
World is soo beautiful (isn’t it?). Back to 2015, it was difficult to program those kind of devices. You had to know C language but also any tricks concerning the update of the firmware, deep sleep, etc.
A big leap was made thanks to the community. And it’s now possible to avoid any software programming.
Tasmota does exactly what i’ve dreamed of. It offers to dynamically set up your device by using a website ❤️. The only thing to do is to flash your device with the latest firmware. Have a look at this page, you should find everything you need to do it.
▶ esptool.py --port /dev/tty.usbserial-1120 write_flash -fs detect -fm dout 0x0 tasmota.bin
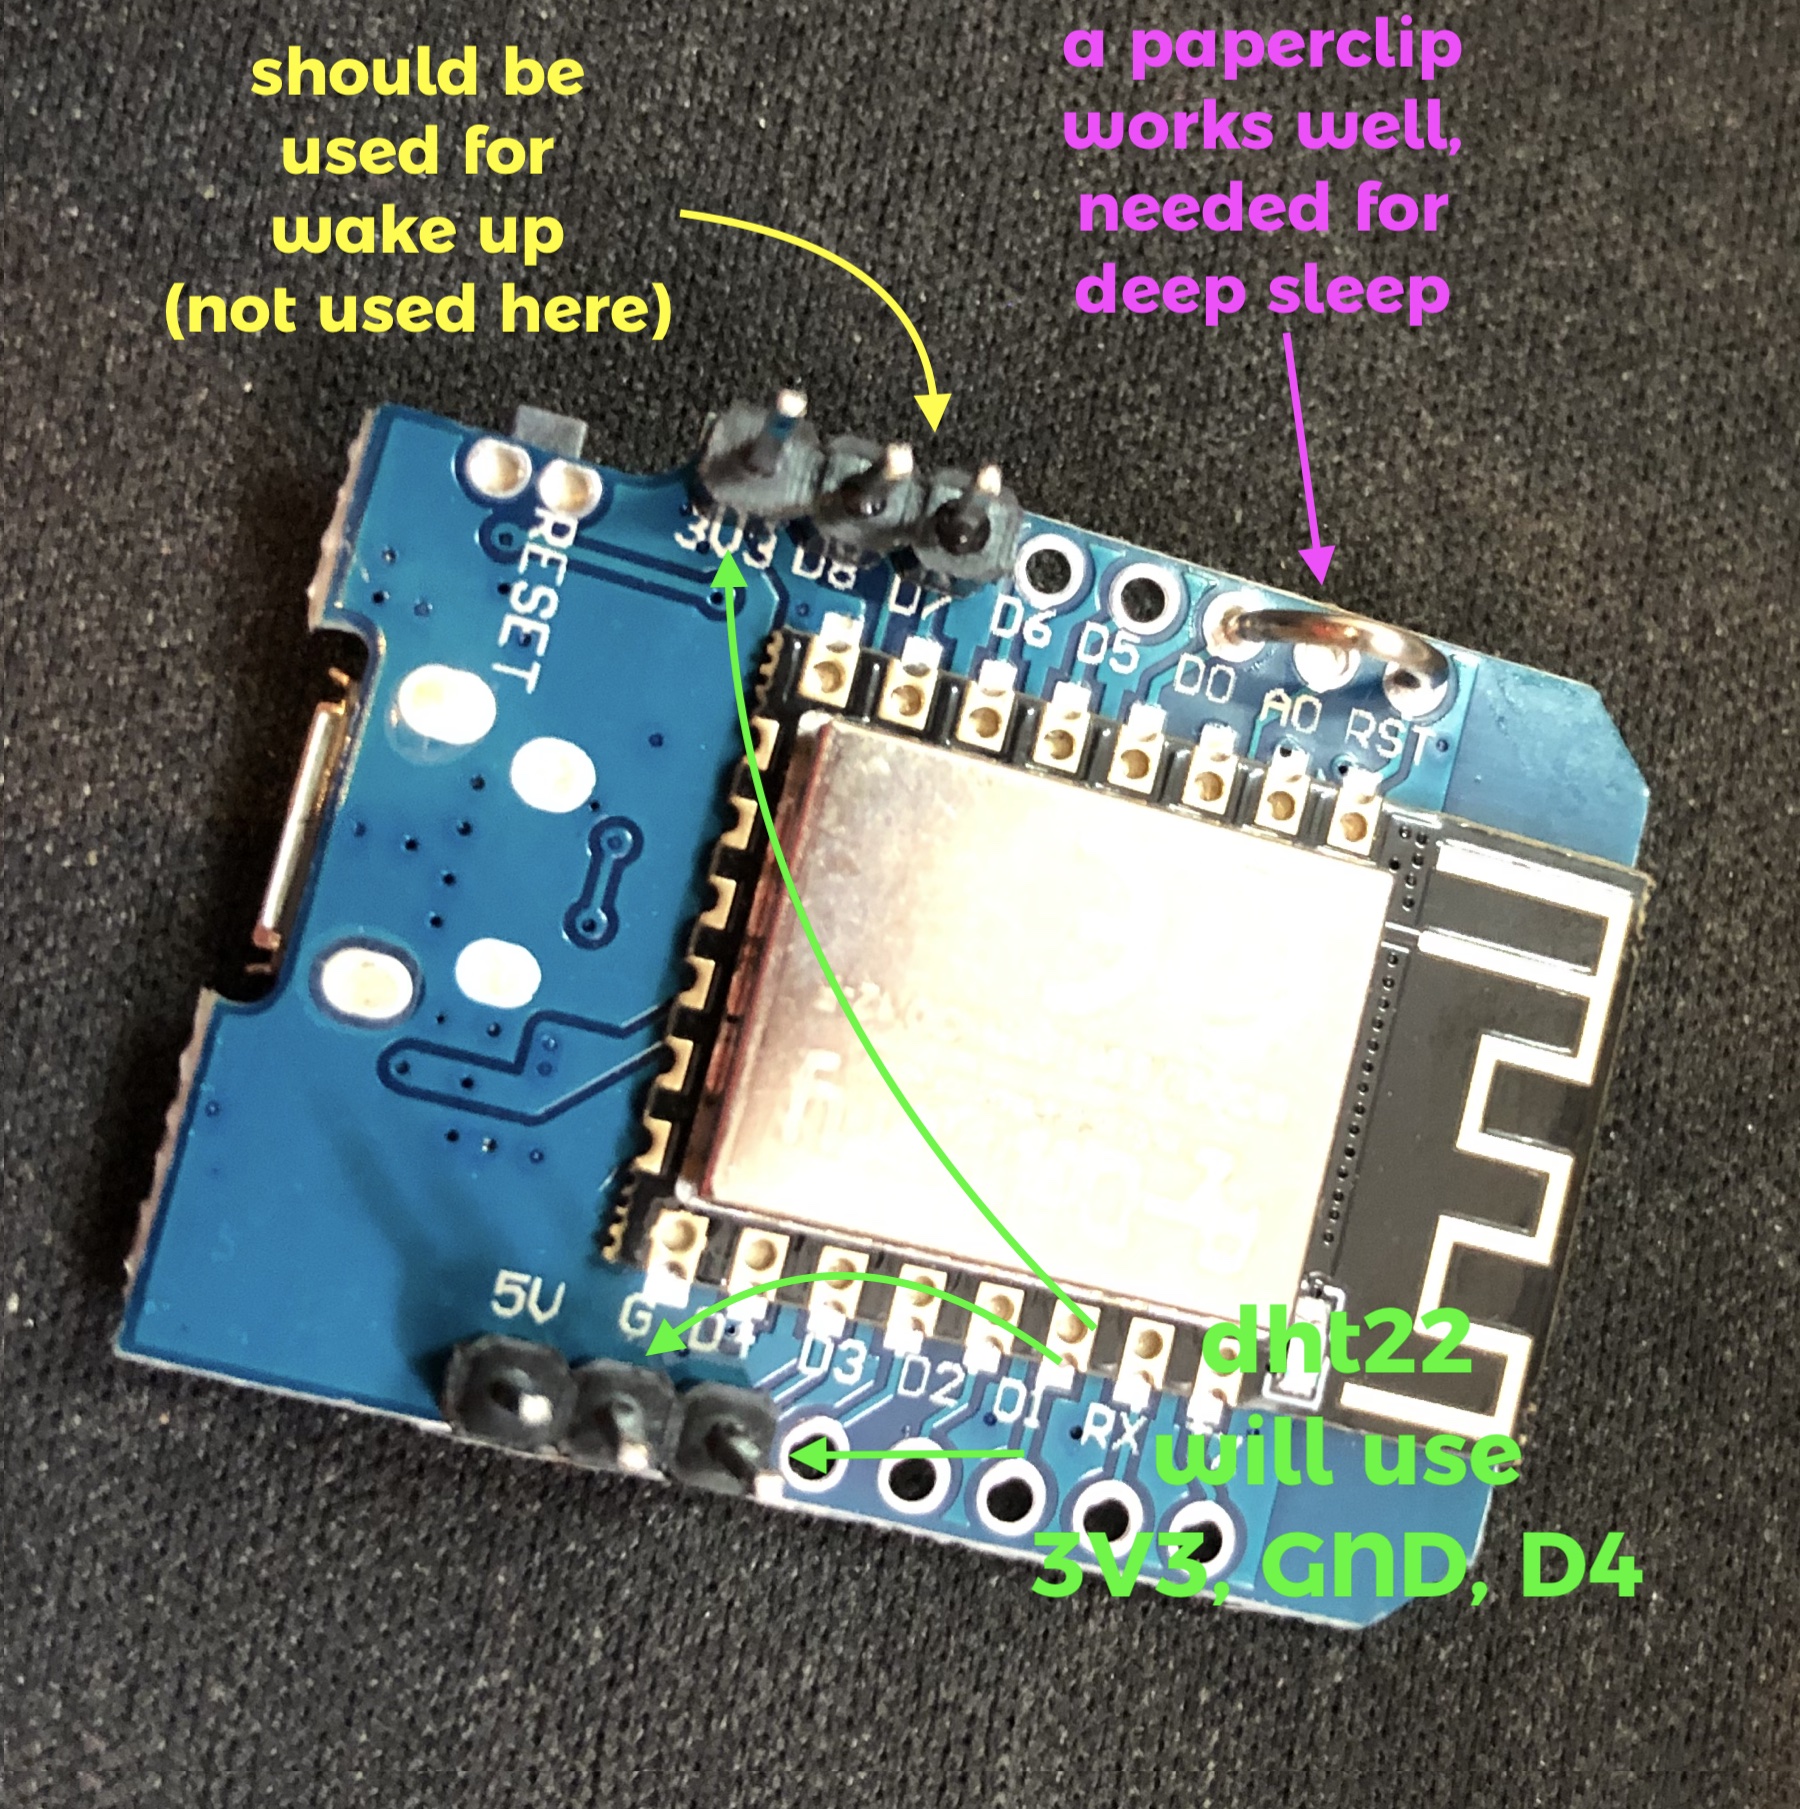
Soldering stuffs
BEFORE DOING ANYTHING, you must flash your D1 mini (after soldering the reset pin to d0, it’ll be not possible anymore)
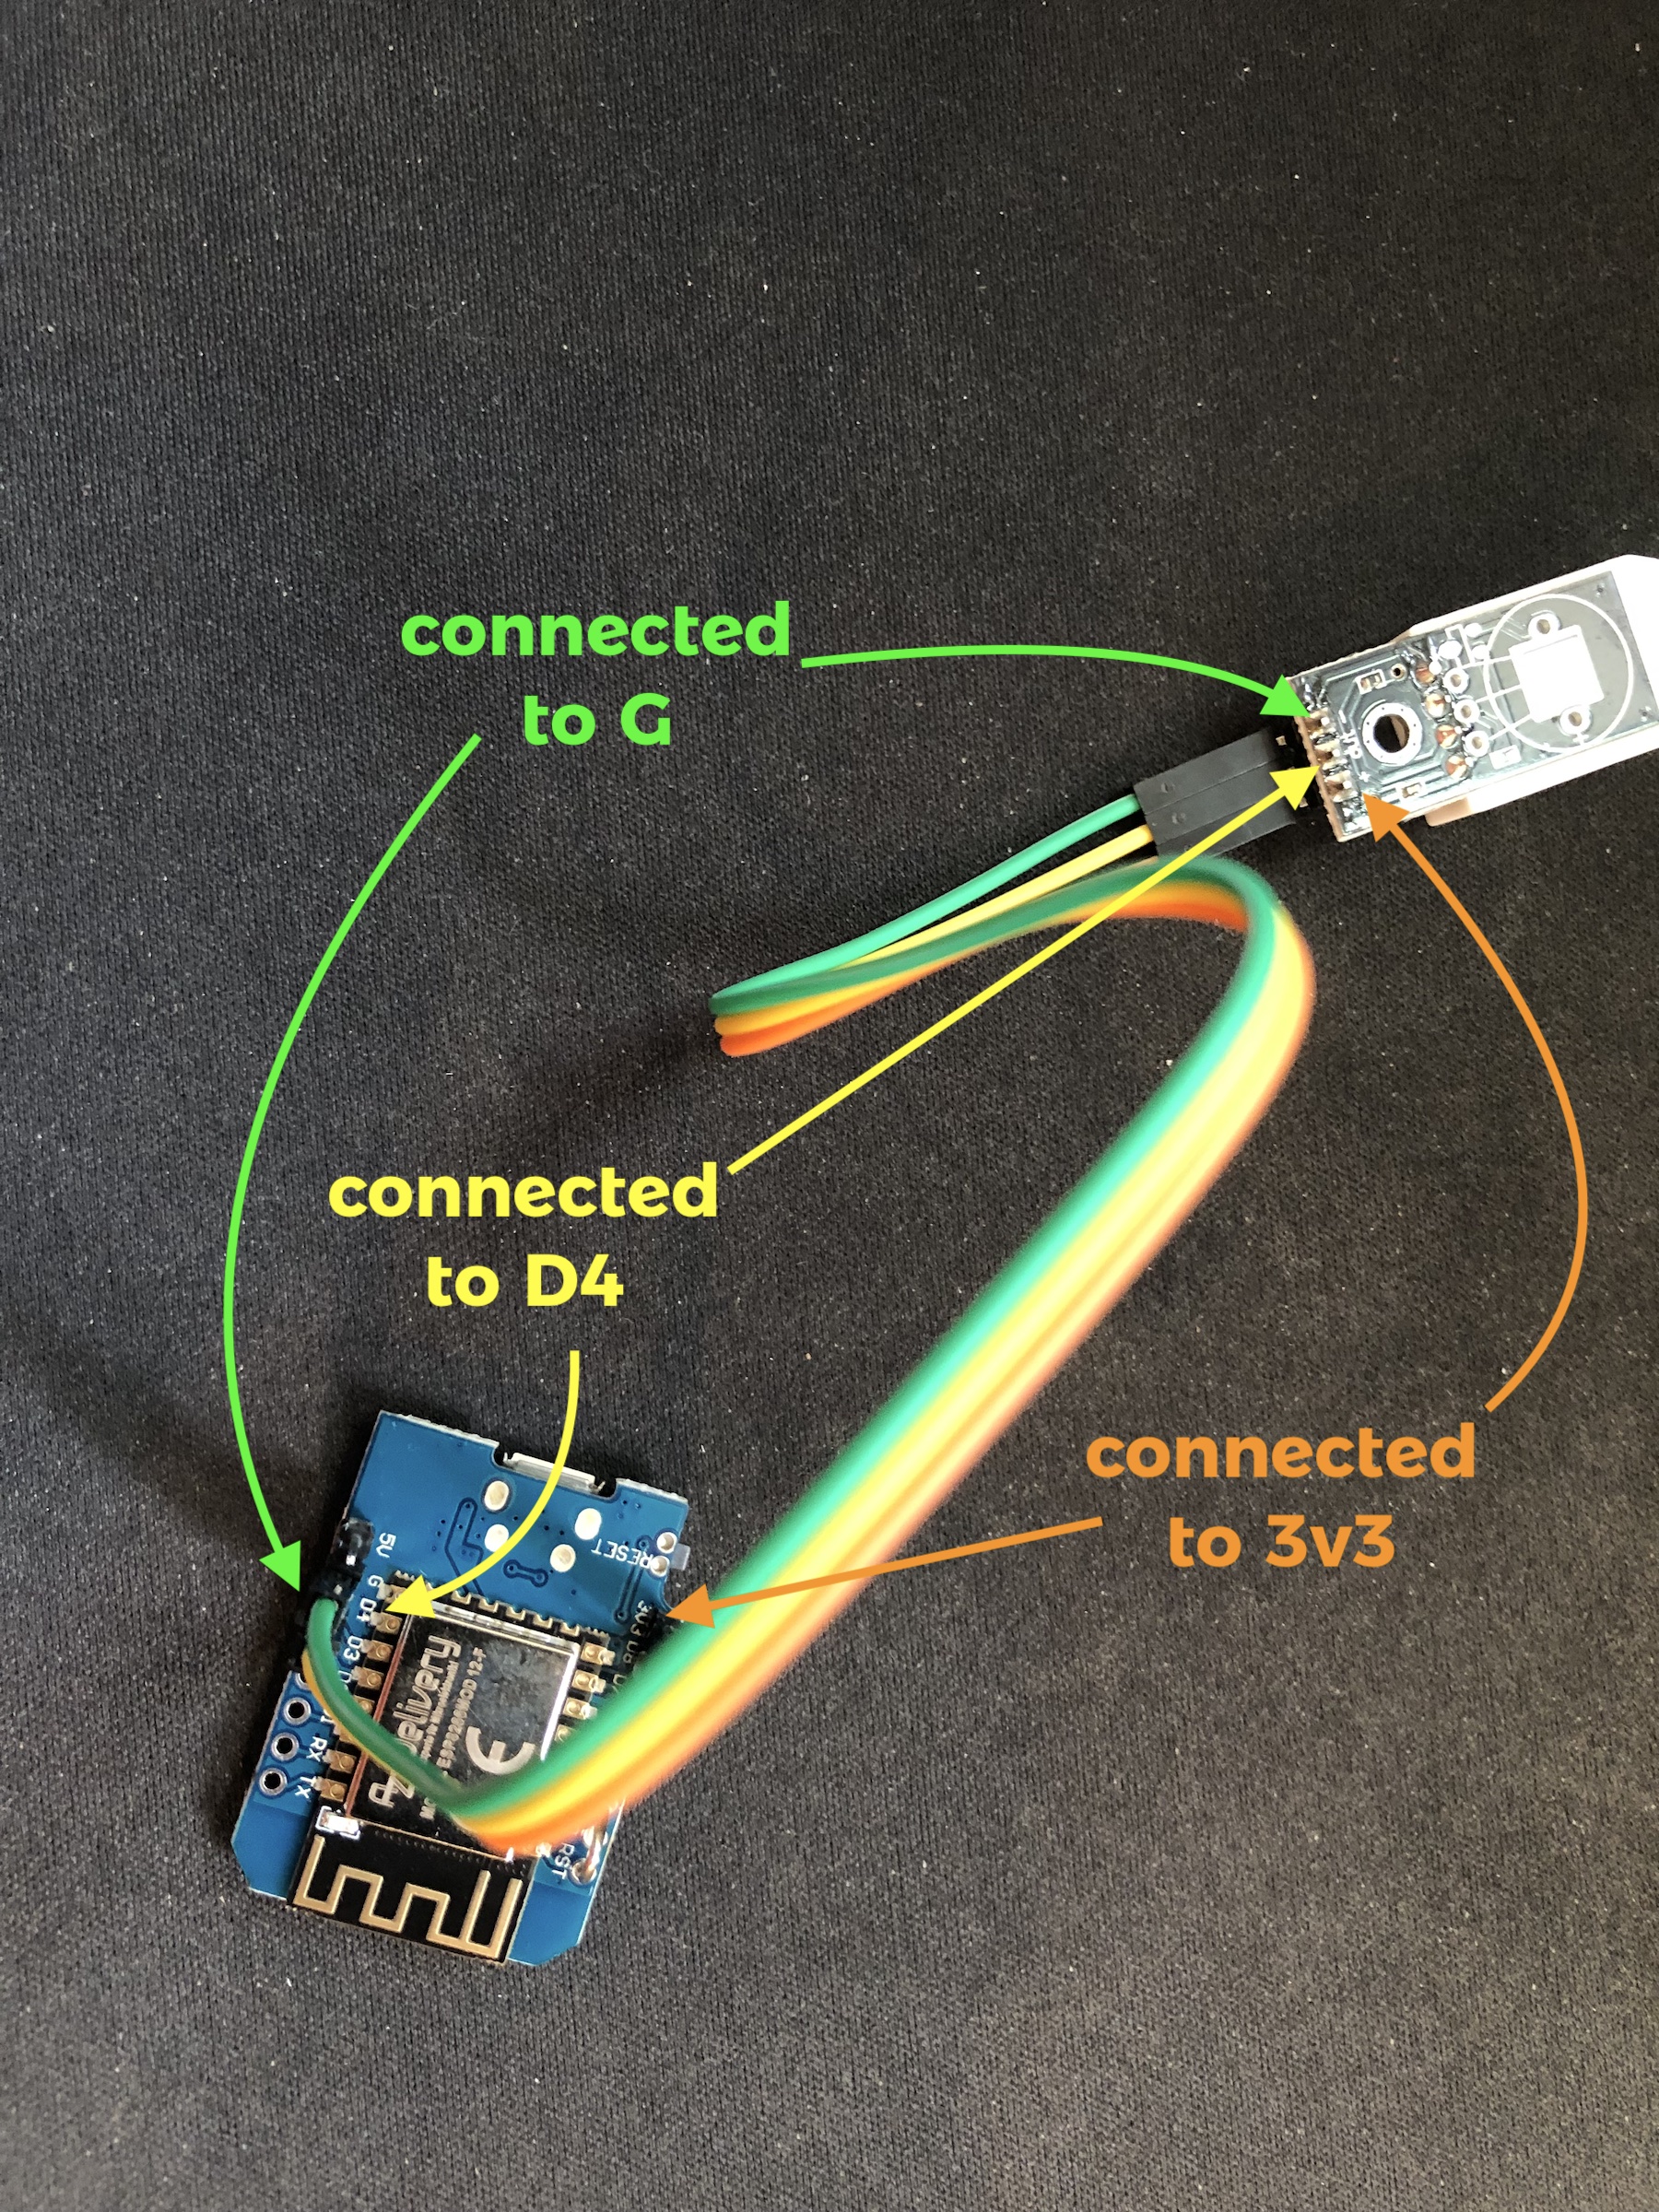
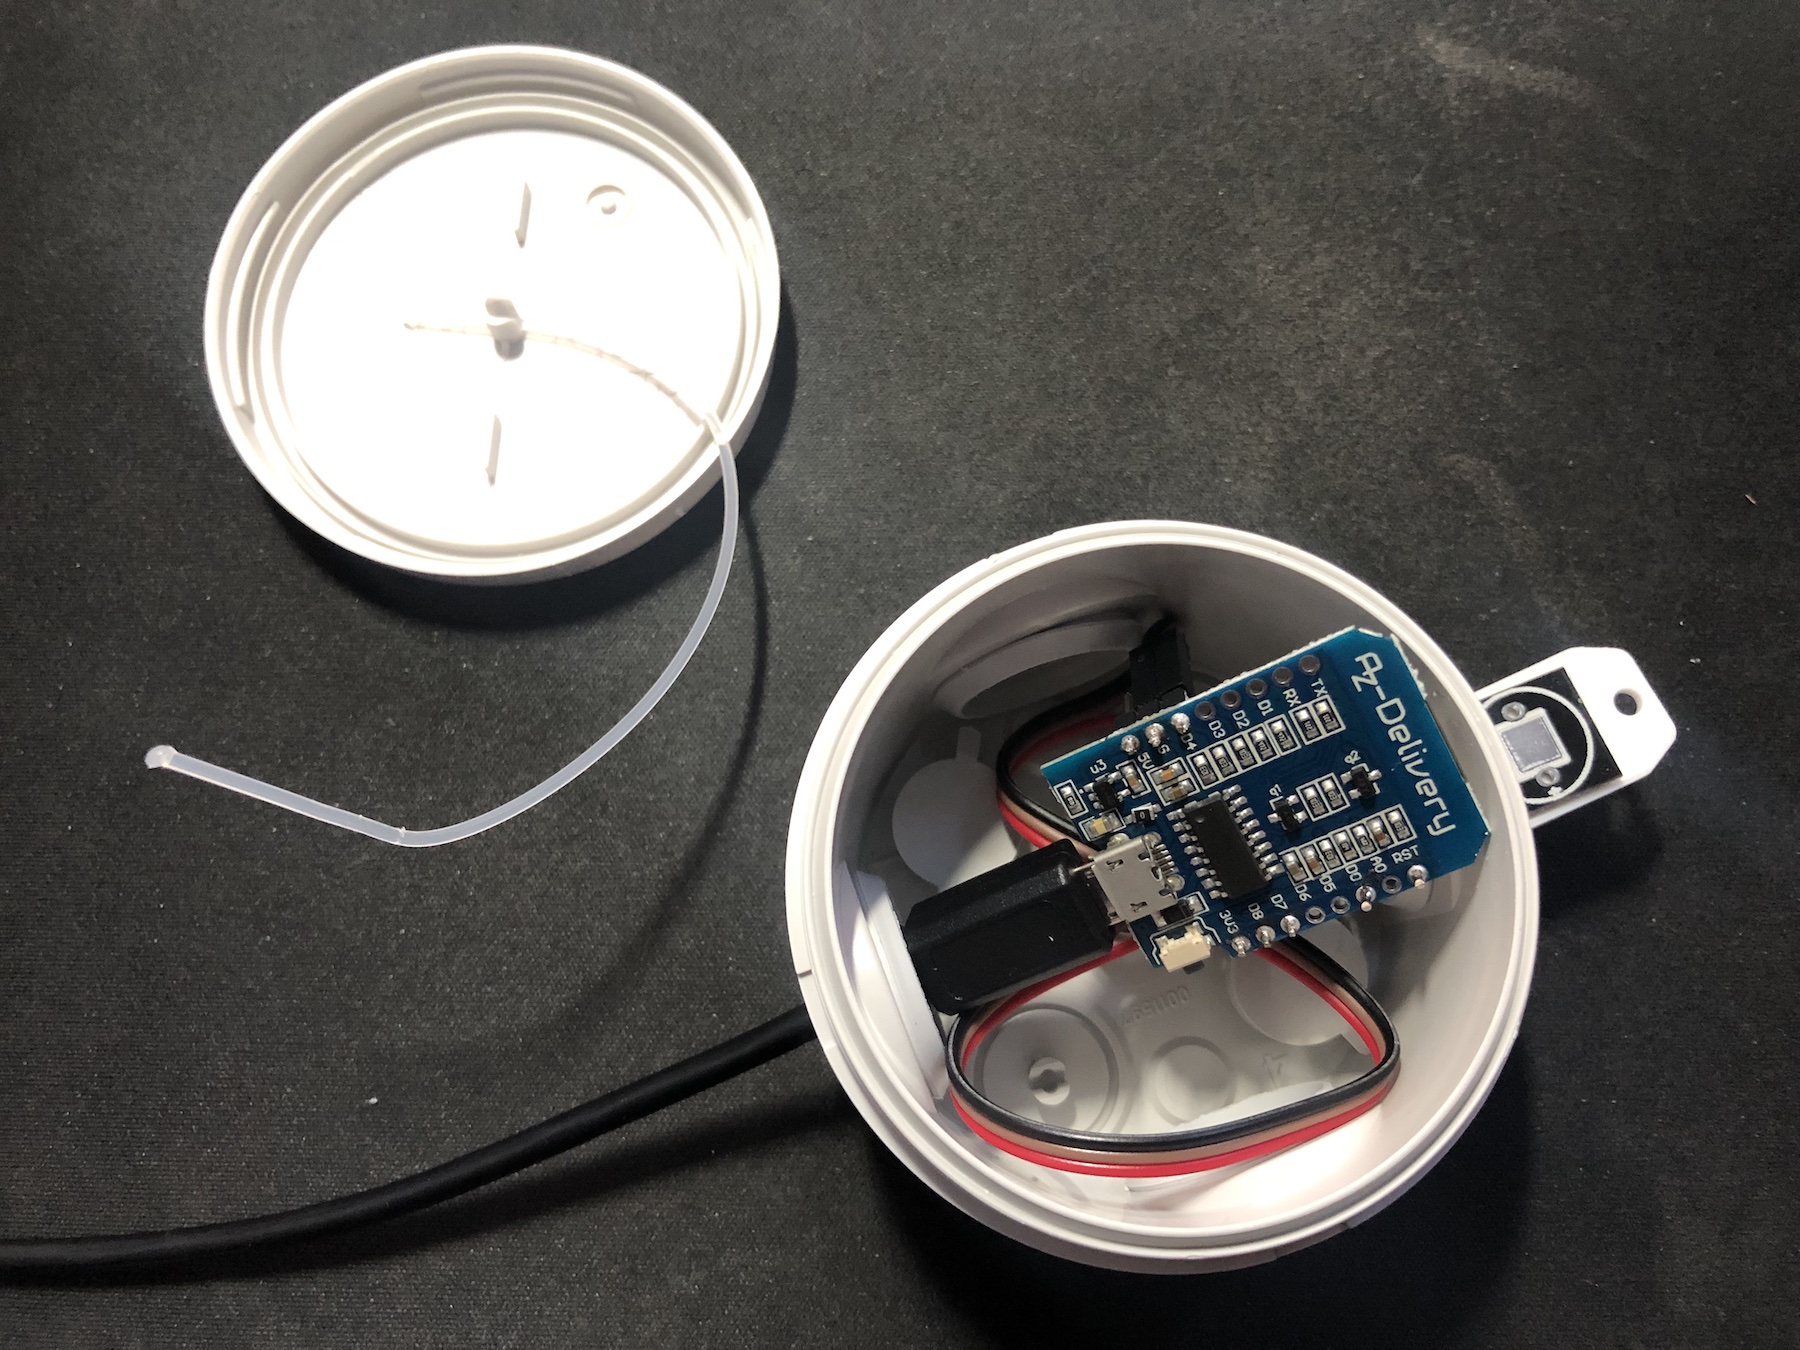
Configure a Server-Side
To analyse the collected temperatures, we need a sort of tank as commonly named a database 😝.
Tasmota communicates with the outside by using the MQTT protocol.
Also, you could use several Smart Home Platforms.
But, because we are focusing on collecting temperatures, we just need a MQTT broker.
Depending on your environment, apt install mosquitto or brew install mosquitto should be fine.
Configure Tasmota
On the first boot, your D1 should provide a tasmota-xxxx-xxxx hostpot.
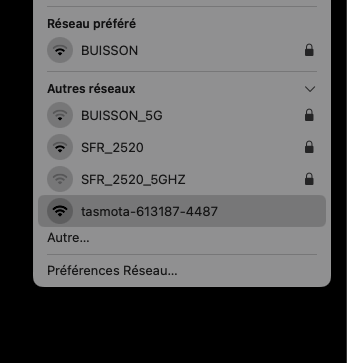
Select it, and go to http://192.168.4.1. You should select your own WIFI.
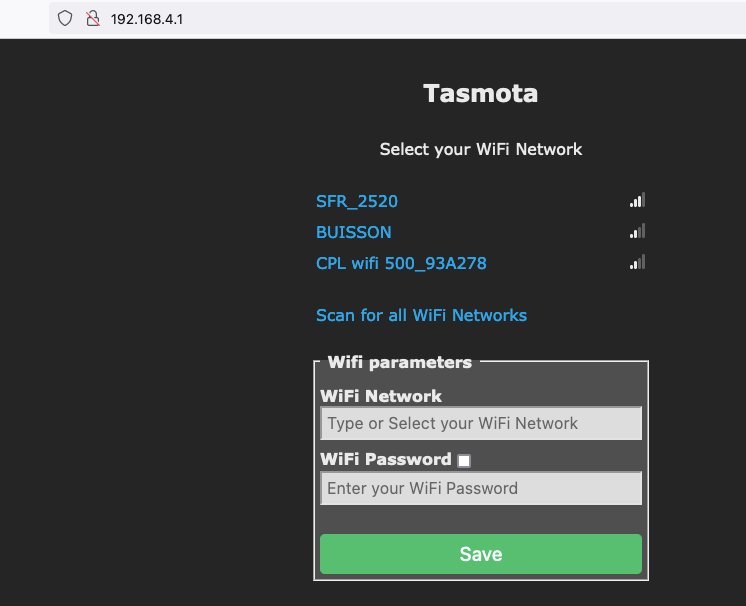
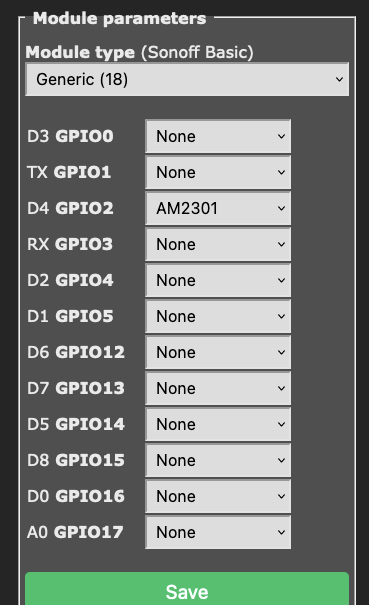
Go to configure and configure modules. Select Generic (18) and set D4 to AM2301.
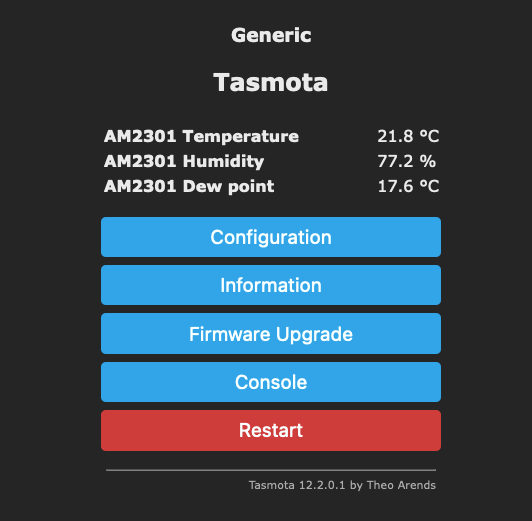
After a reboot, you should see temperature.
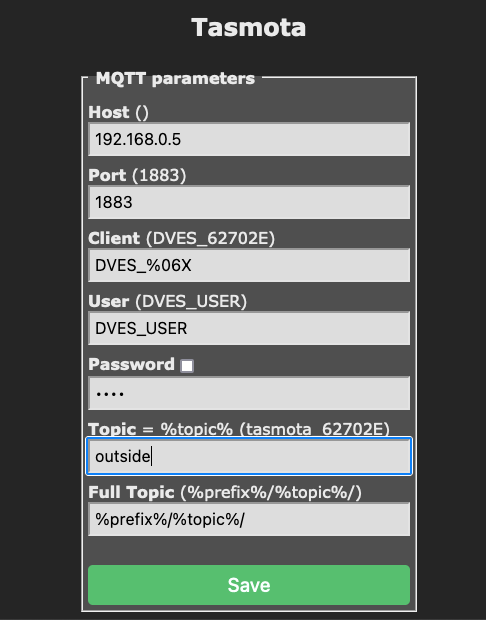
Set up the MQTT parameters (you can also override the topic name)
I advice you to set up a more human readable name of your device.
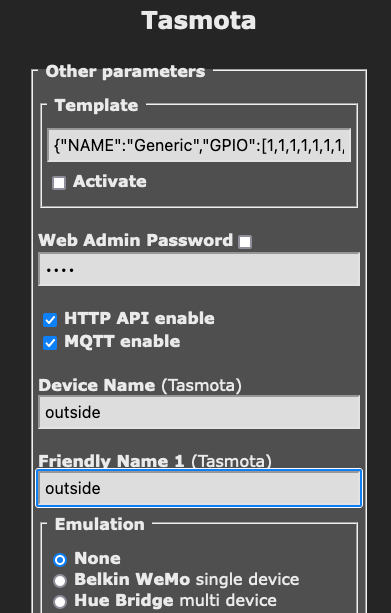
it’s much better
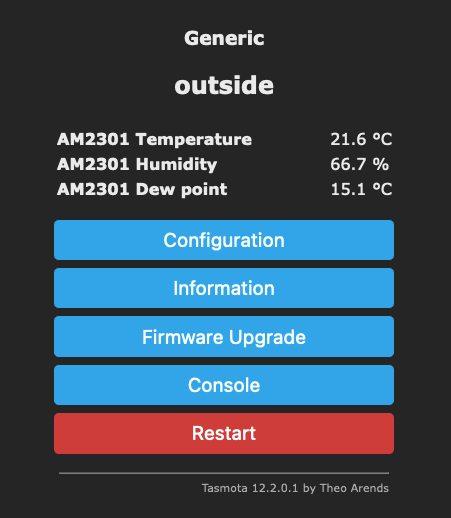
By default, the D1 will report temperature every 300 seconds. You could use the Deep Sleep feature to gain autonomy and reduce consumption.
// will report a metric every 10 minutes and go into deep sleep right after.
▶ mosquitto_pub -h 192.168.0.5 -t cmnd/outside/DeepSleepTime -m 600
You should see logs like this :
▶ mosquitto_sub -h 192.168.0.5 -t tele/# -v
tele/outside/LWT Online
tele/outside/STATE {"Time":"2022-10-20T10:29:14","Uptime":"0T00:00:08","UptimeSec":8,"Heap":28,"SleepMode":"Dynamic","Sleep":50,"LoadAvg":19,"MqttCount":1,"Wifi":{"AP":1,"SSId":"BUISSON","BSSId":"1C:3B:F3:B3:93:DF","Channel":10,"Mode":"11n","RSSI":30,"Signal":-85,"LinkCount":1,"Downtime":"0T00:00:03"}}
tele/outside/SENSOR {"Time":"2022-10-20T10:29:14","AM2301":{"Temperature":21.7,"Humidity":75.8,"DewPoint":17.2},"TempUnit":"C"}
tele/outside/LWT Offline
Bonus Track, autonomous temperature sensor
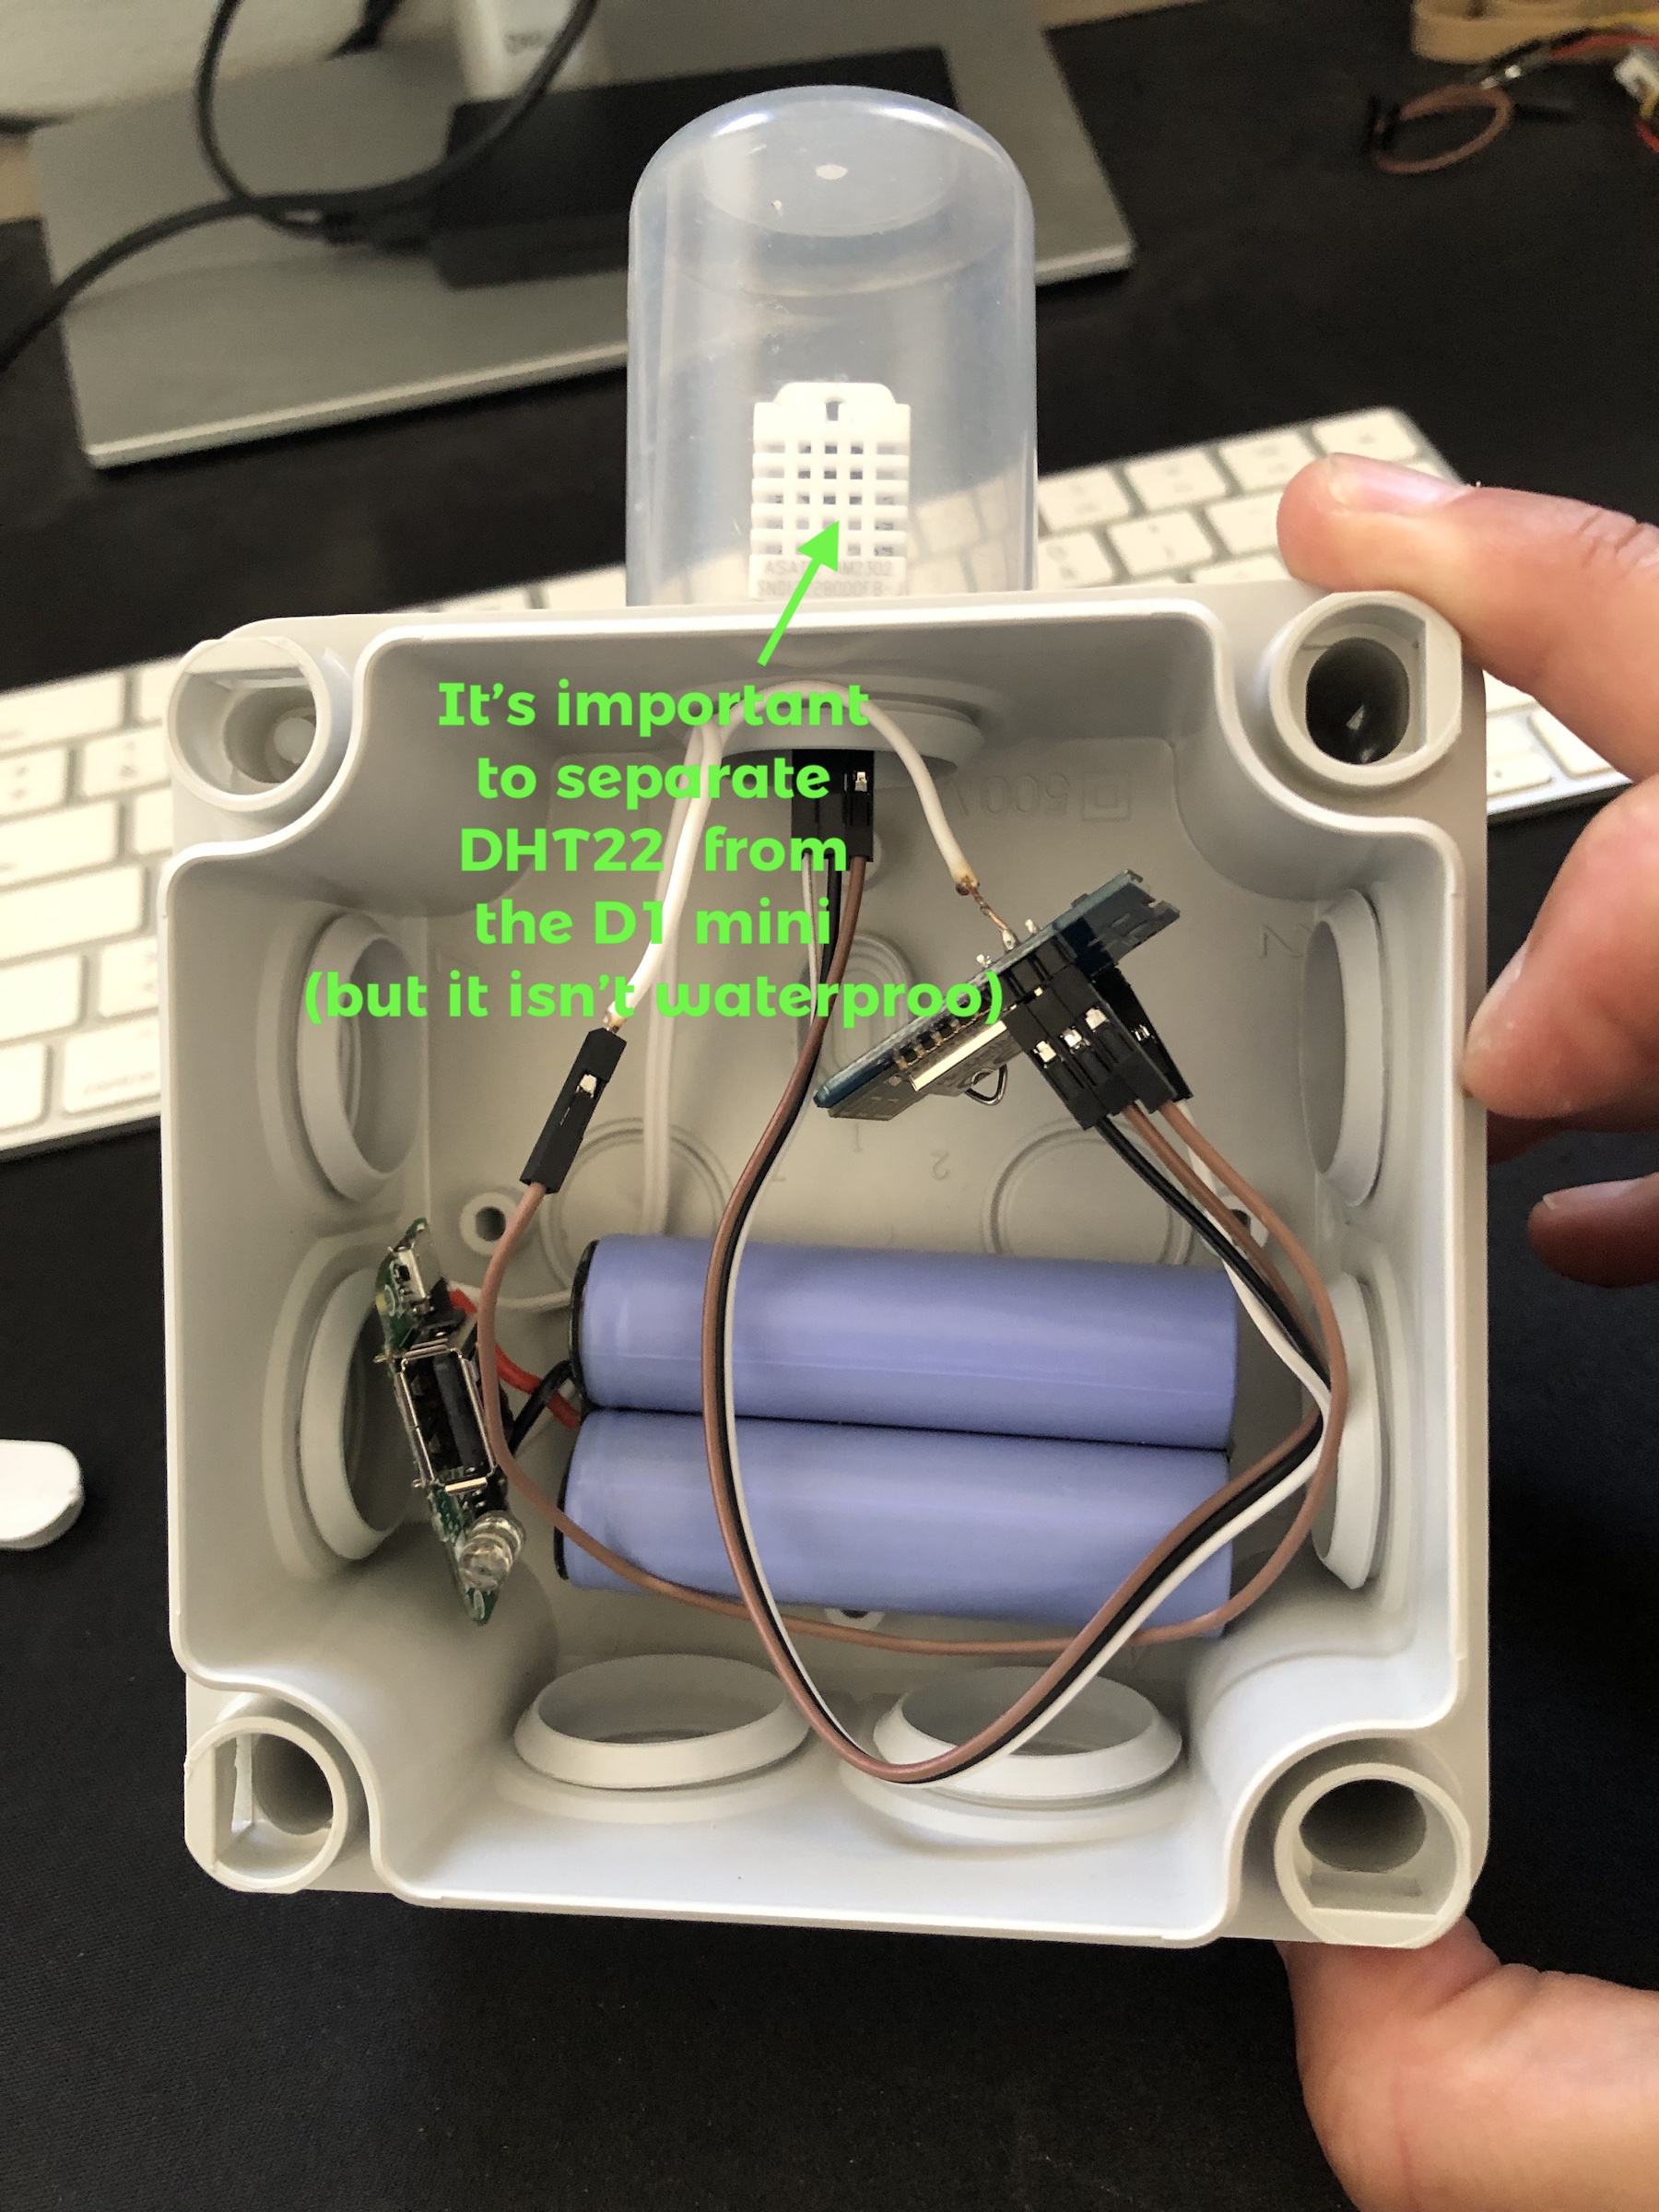
You can recycle a Li-ion battery based on 18650 stick. Depending of your battery, you could find 2 types of voltage : 3.7v or 4.2v.
You should check the voltage with a voltmeter. For example, my recycled “usb-battery-charger” pretented to be 3.7v but in fact was 4.2v.
4.2v should be linked with the 5v pin and i suppose the 3.7v with the 3.3.
Using the 5v seems more secure for your installation.
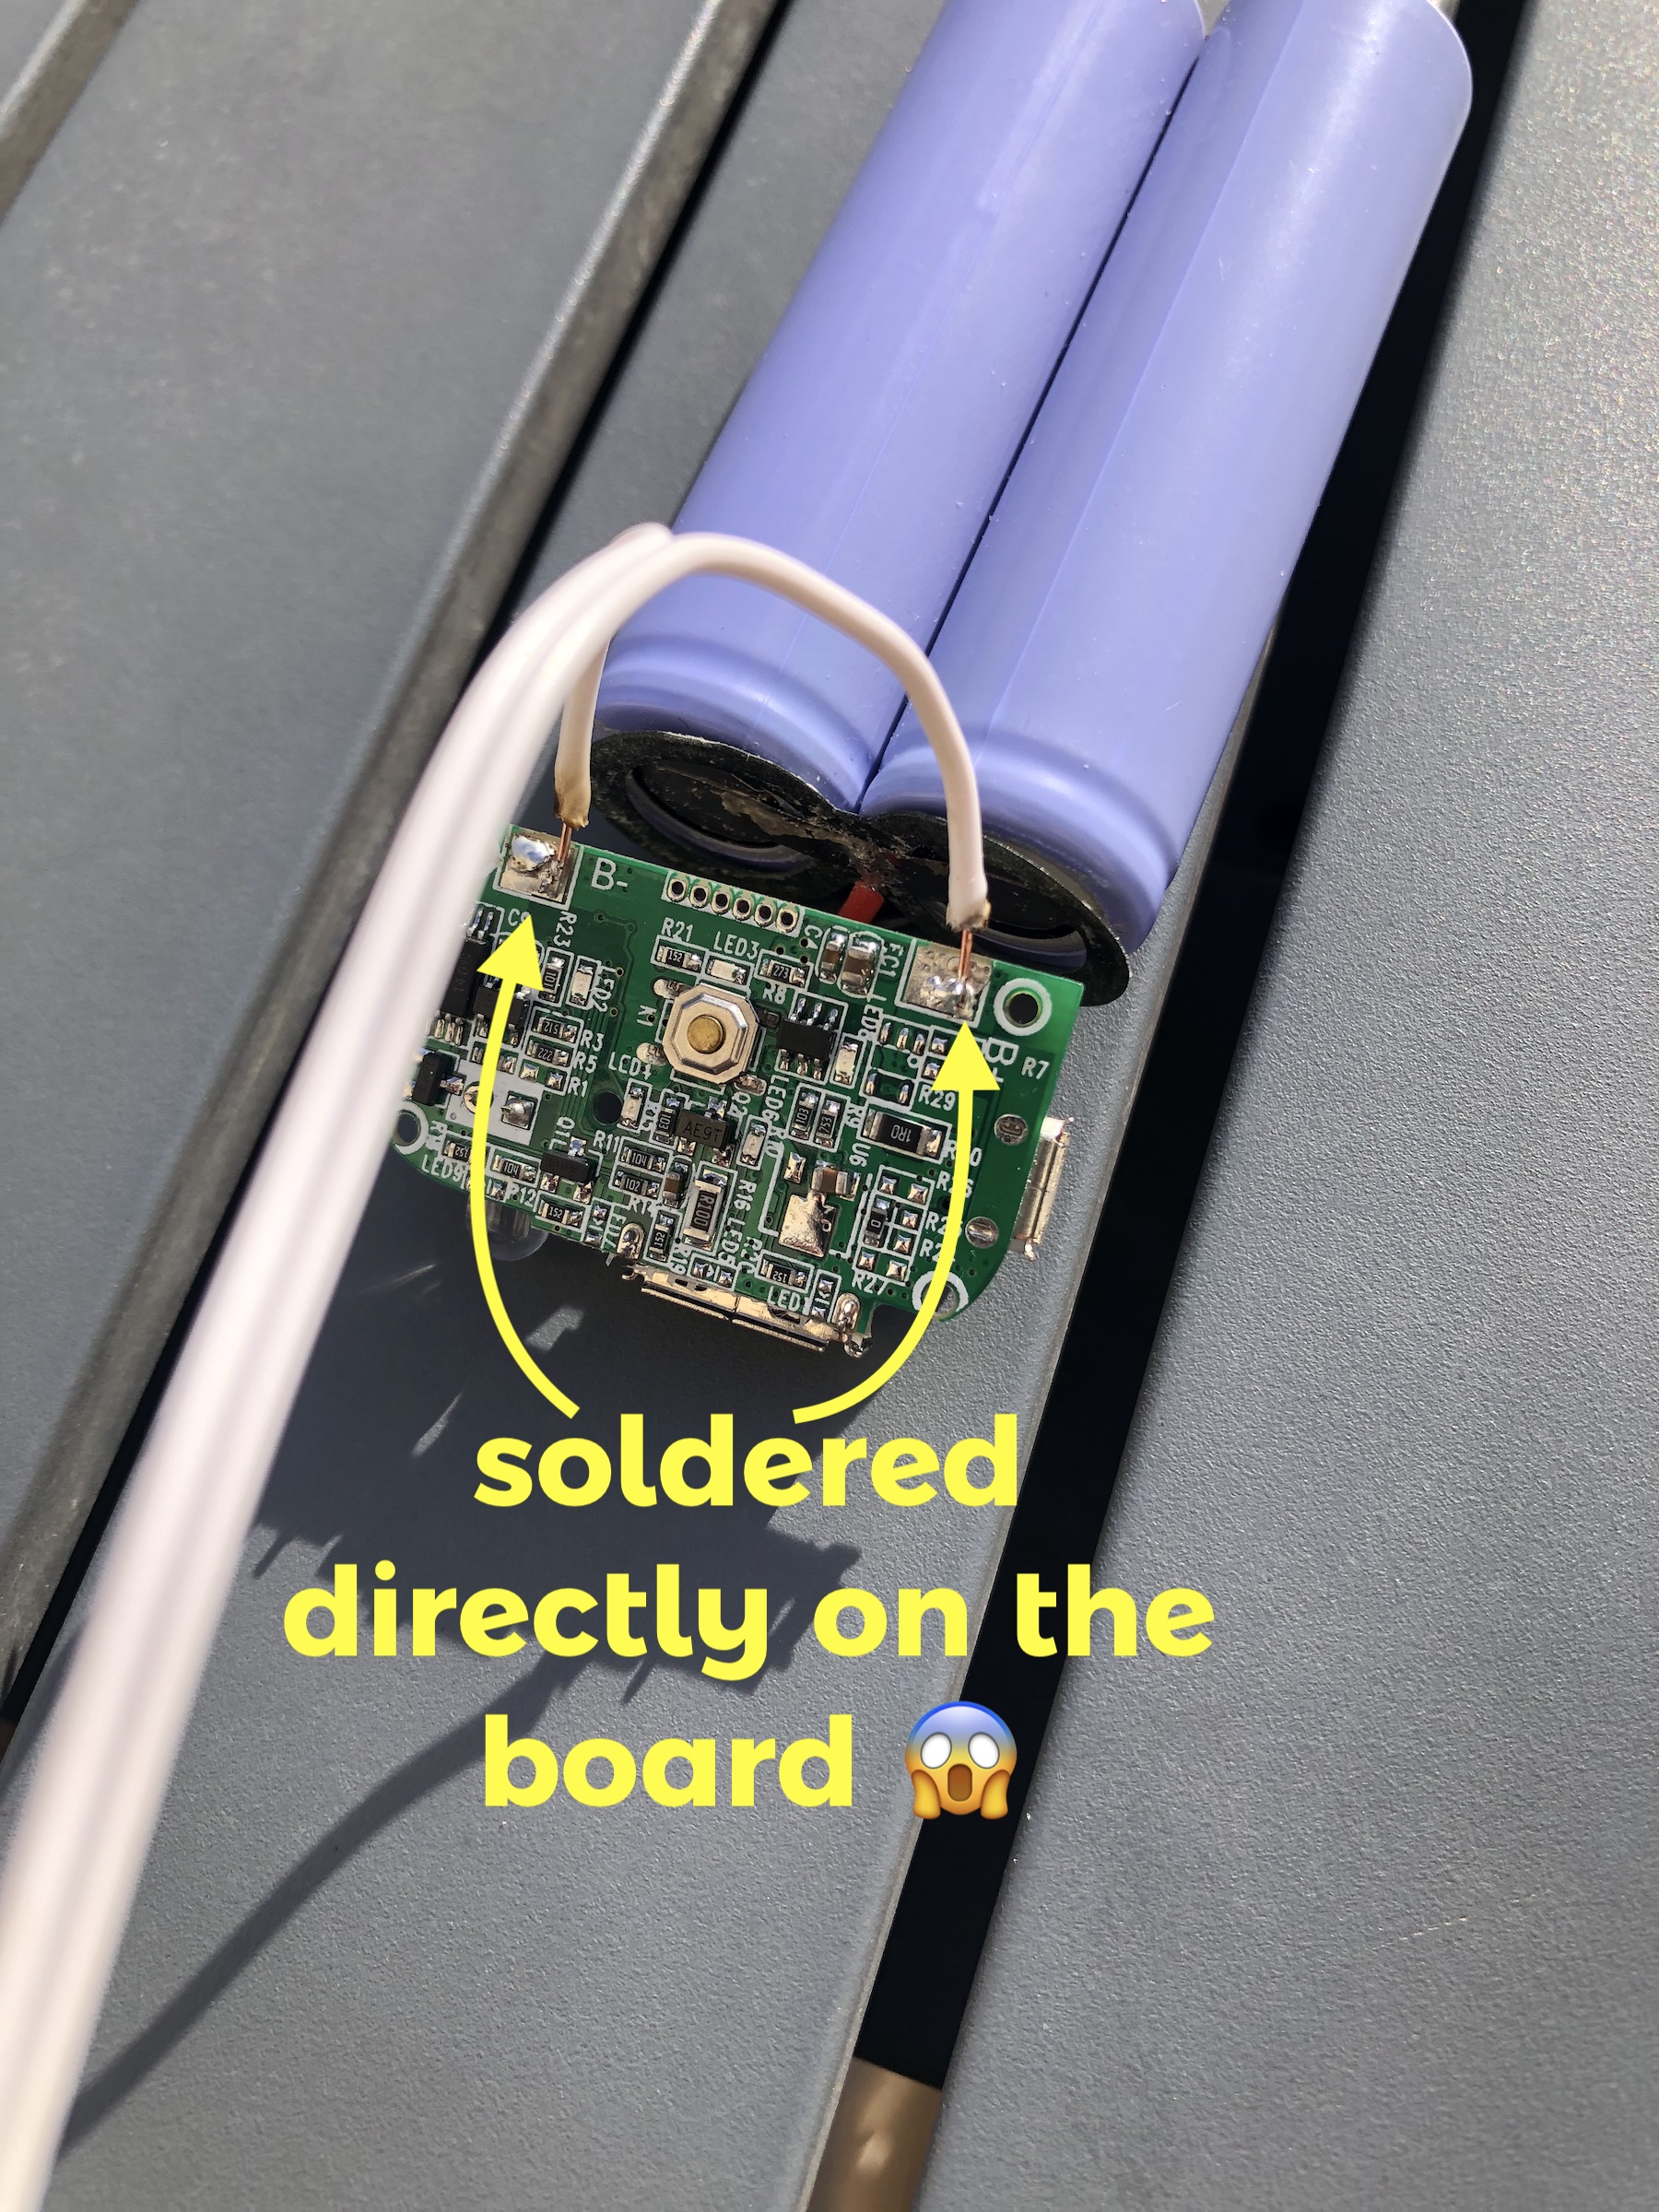
It’s important to be careful not to lose the ability to turn off your device. If you solder both wires, you won’t be able to restart your device. (the reset button doesn’t work on deep sleep).
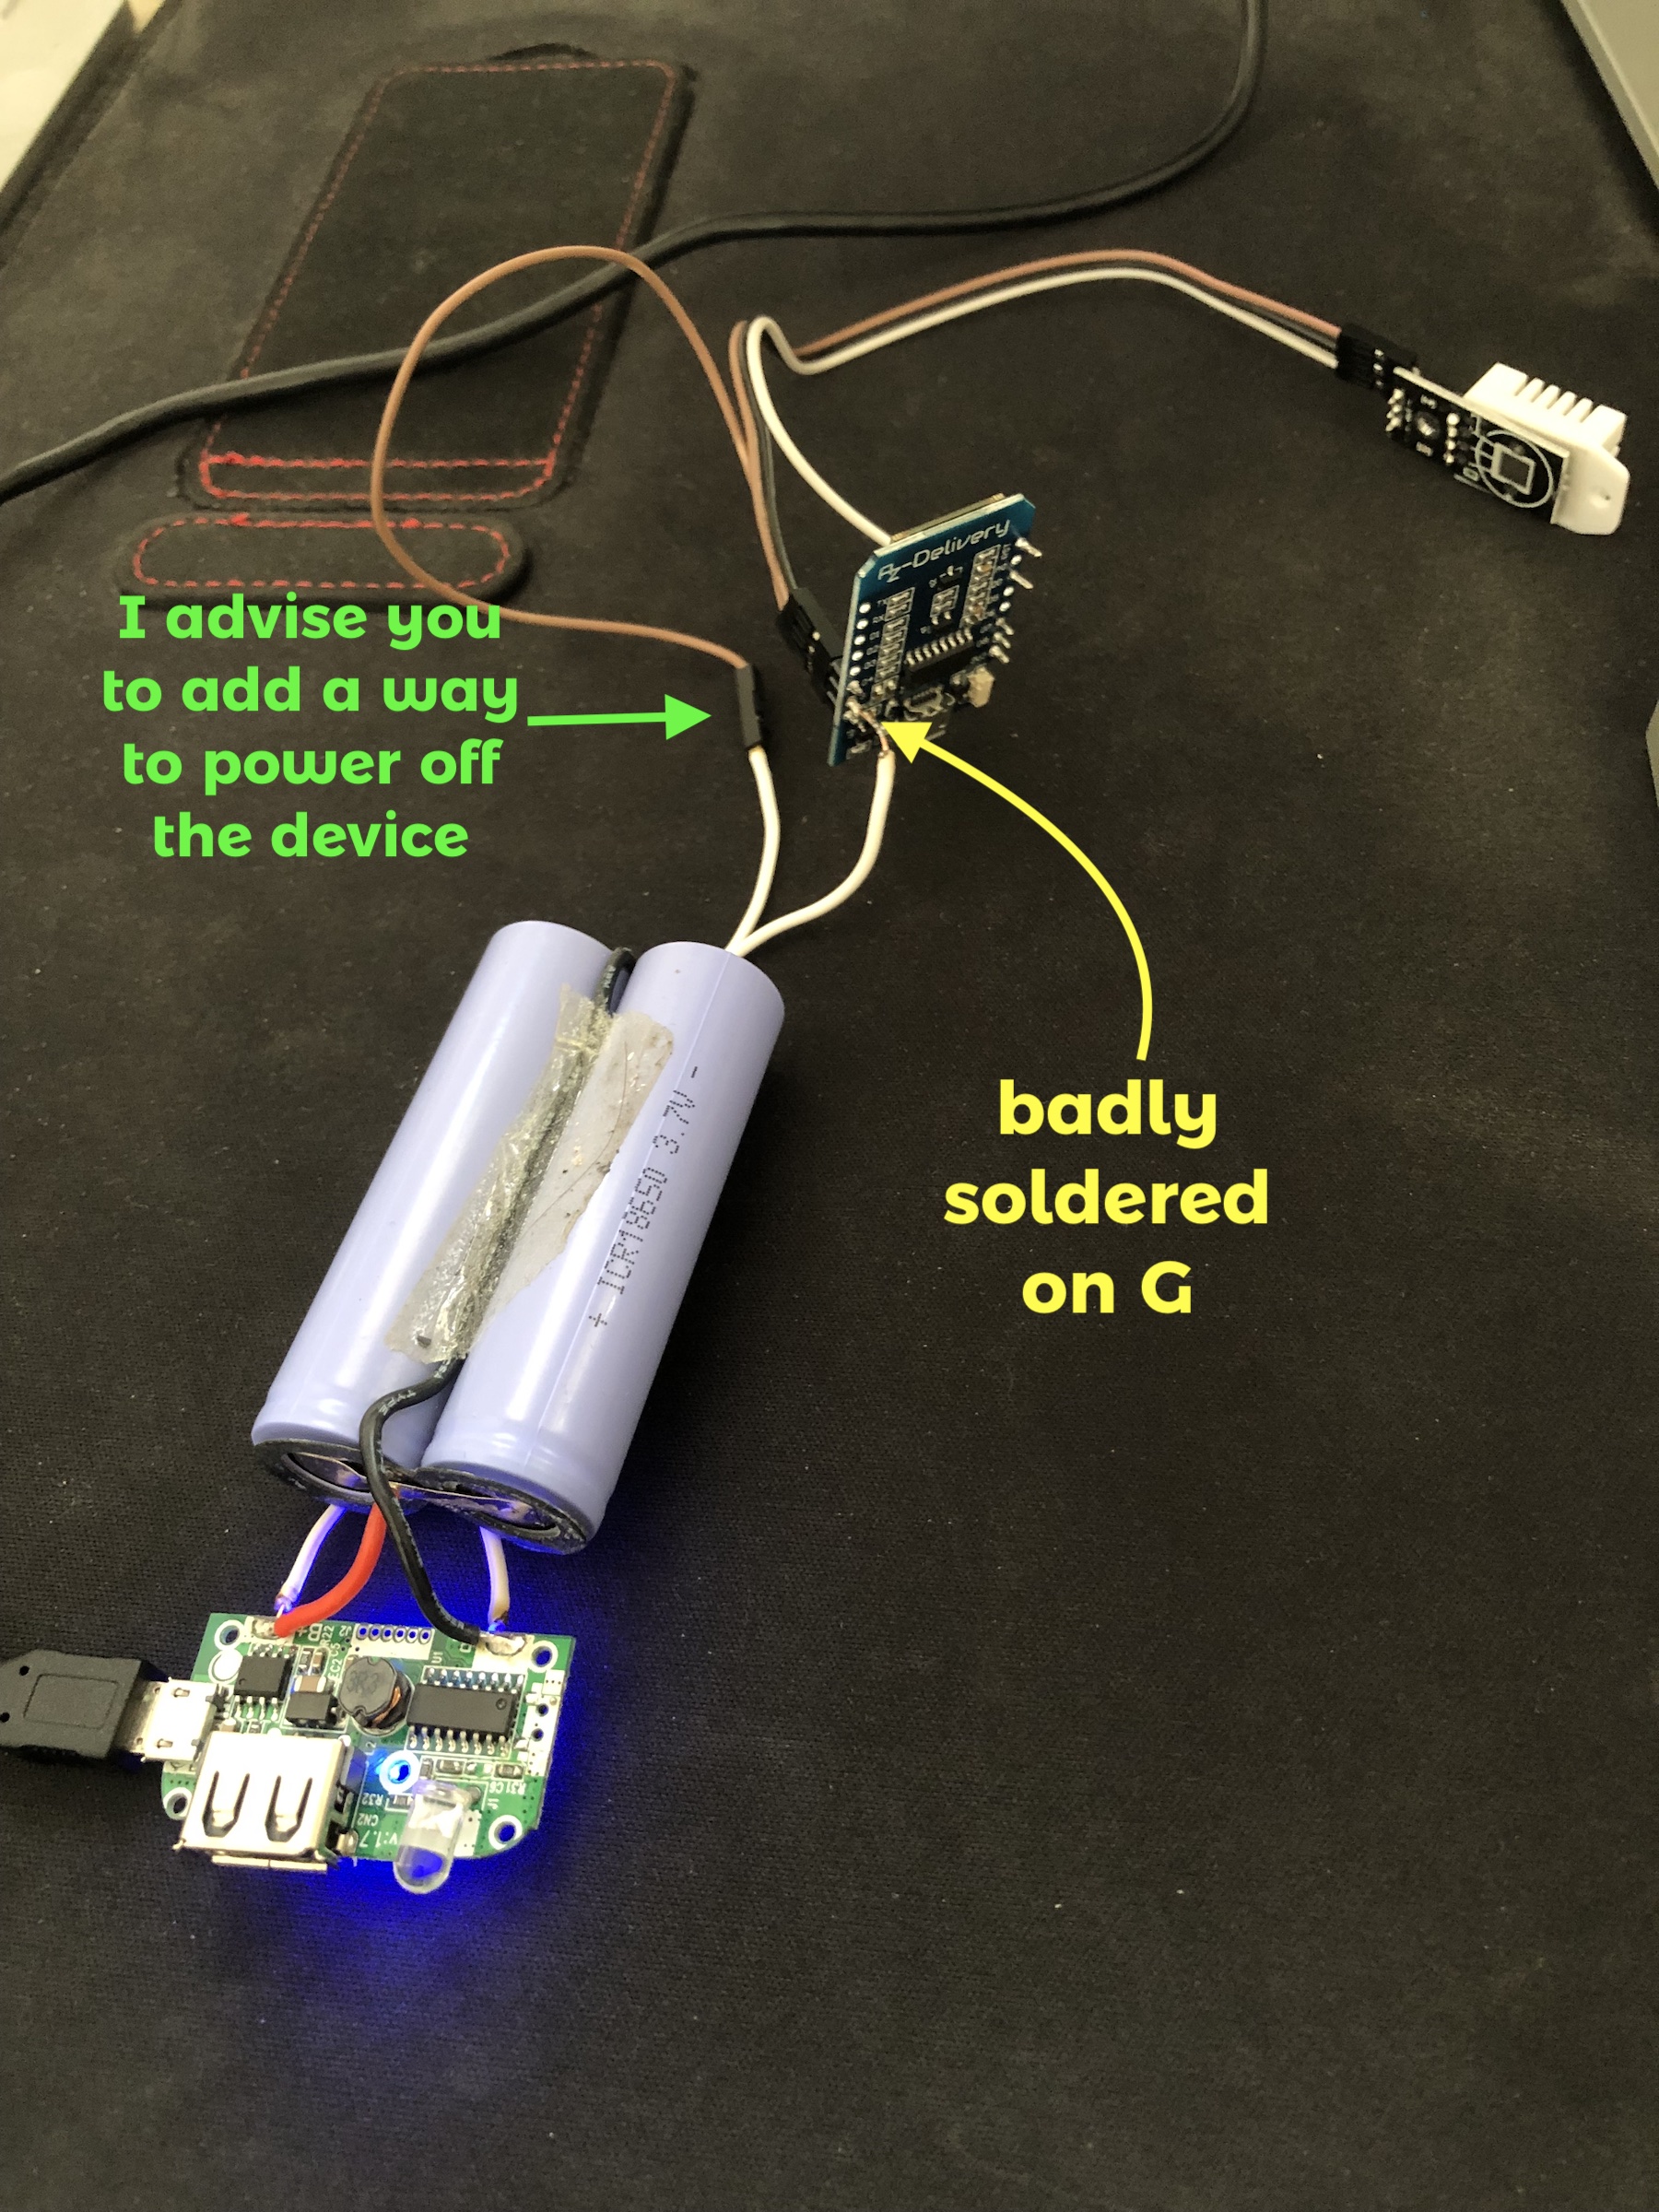
Also, remember to waterproof and isulate the DHT22 because D1 mini and battery should heat up.
